How to add In-App Purchases in your iOS app?
In-app purchases (IAP) is a great way to monetize your iOS and macOS applications. In the AppStore, there are applications with the “Offers In-App Purchases” label near the Buy or Get button. It means that these apps contain in-app purchases. IAP is most often used to unlock additional content or functionality. Usually, apps with in-app purchases are free. It helps engage new users and sell more features to more people.
Apple keeps 30% of the purchase price by default.
In this article, we will take a look at everything about in-app purchases — iTunes Connect settings, Swift code using and testing.
First Things First: IAP Types and Examples
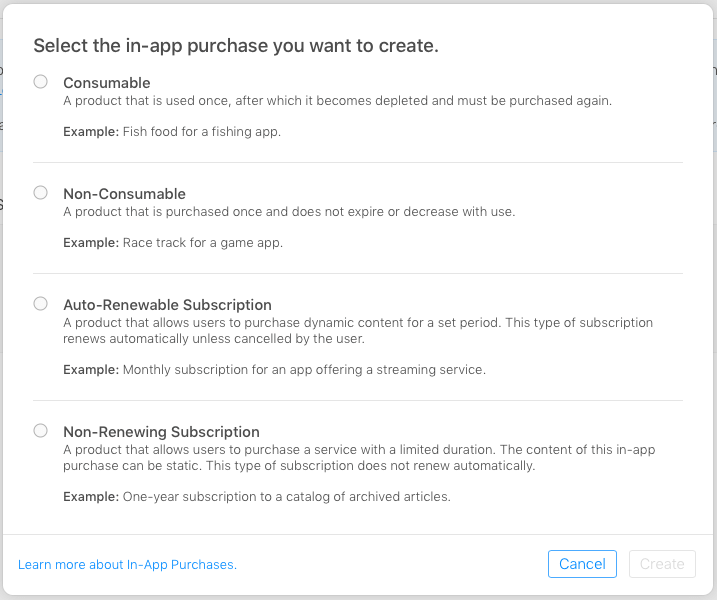
There are different types of IAP you can add:
- Consumable. These can be bought more than once and can be used up. These suit good for extra lives, in-game currency or temporary power-ups.
- Non-Consumable. Something that you buy once, and expect to have permanently such as book buying, extra levels or unlockable content. It works even if you log in with your Apple ID on another device.
- Non-Renewing Subscription. This content is available for a fixed period of time. To receive access to the required functionality, we need to subscribe again.
- Auto-Renewing Subscription. A repeating subscription such as a monthly Apple Music subscription.
Note: In-App Purchases can be offered only for digital items, and not for physical goods or services. For more information about it, check out Apple’s full documentation on Creating In-App Purchase Products.
Examples of IAP:
- In a photography app you can buy extra effects;
- Open the news app and you can buy a monthly subscription with lots of premium content;
- Turn off ads in apps;
- Buy coins or other virtual currency in a game, so you can progress faster.
iTunes Connect Setup
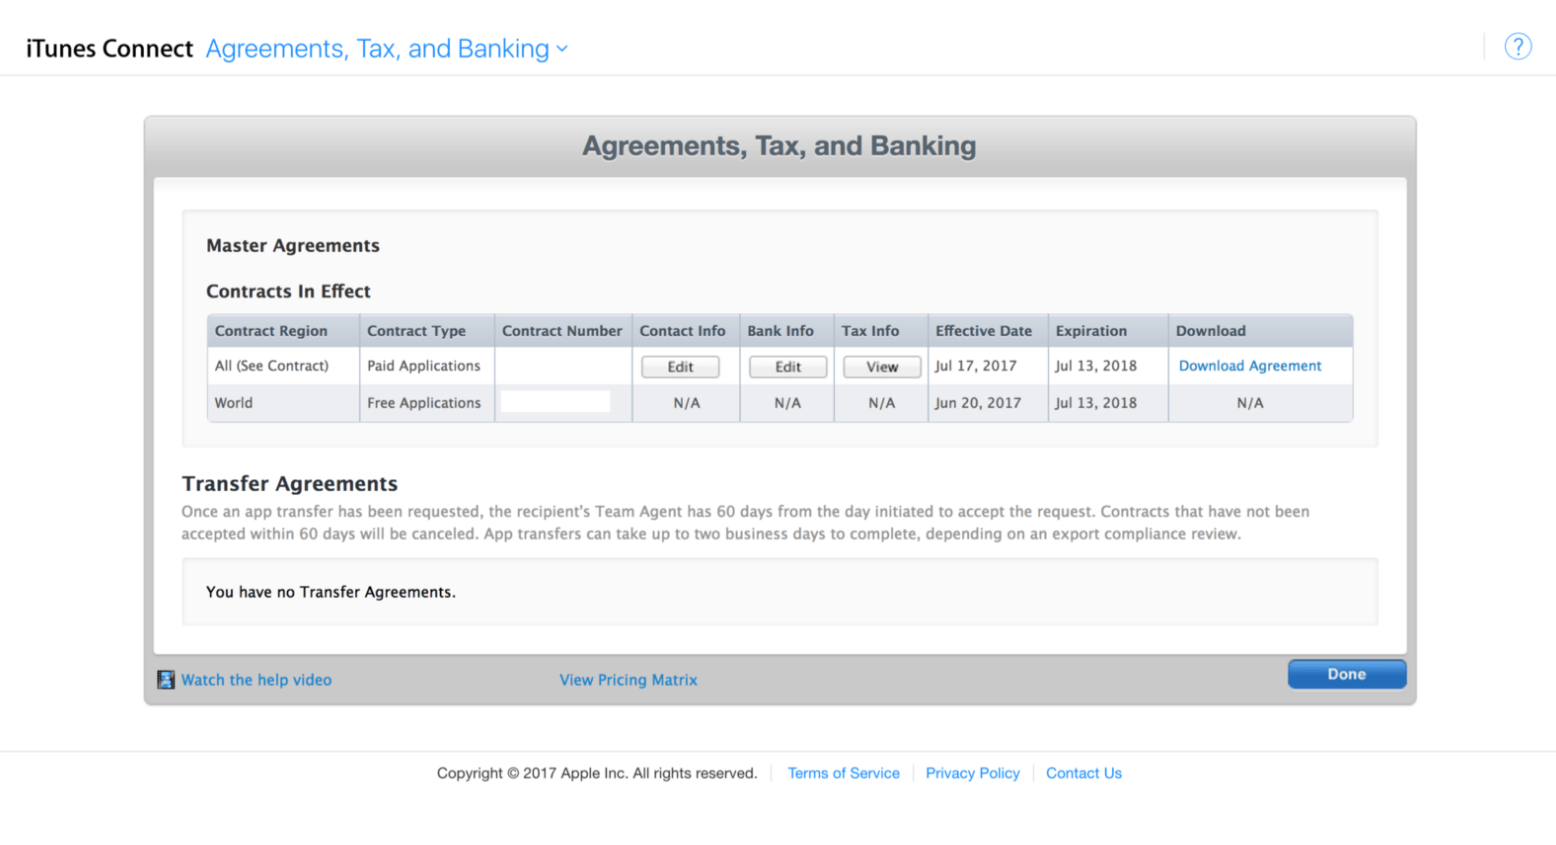
Enter your bank account details
First, you need to enter your bank information. That can be done by going to the Agreements, Tax, and Banking section in iTunes Connect. When you’re done, you should have something like the following:
Add Users
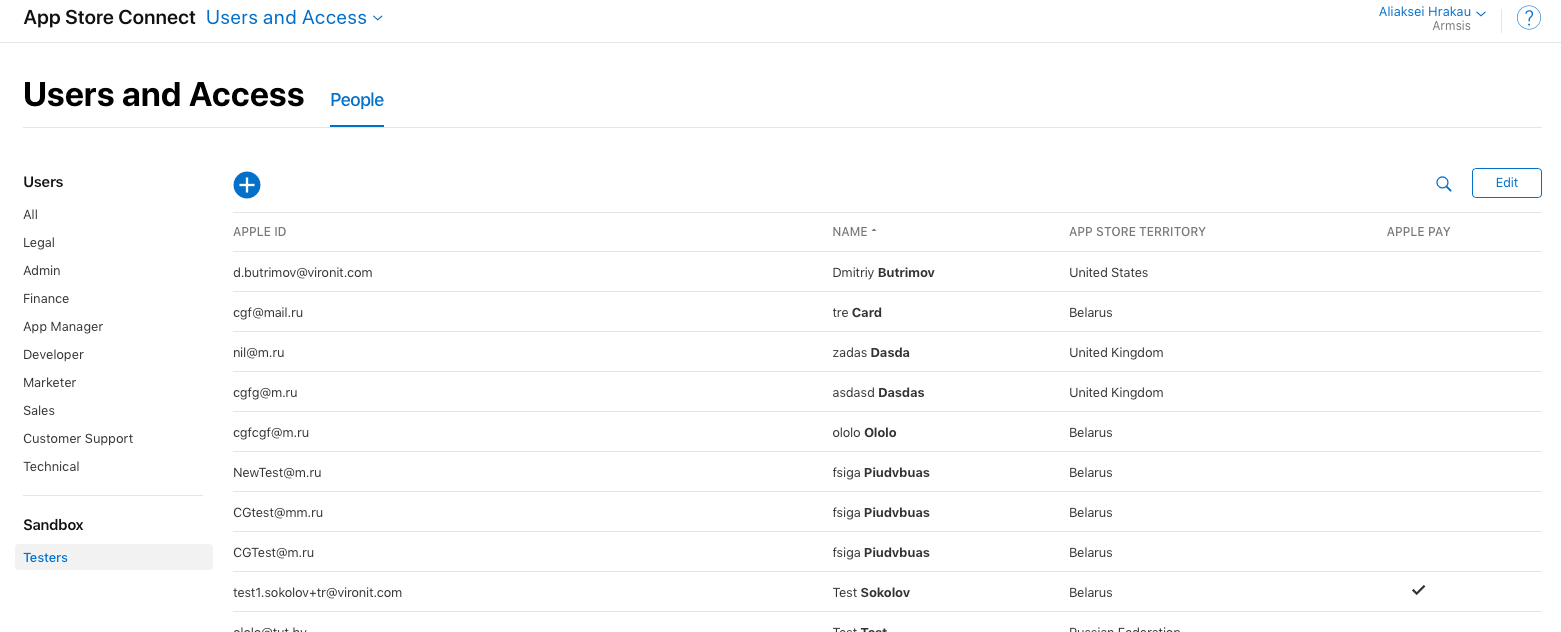
Next, we need to add users to the Sandbox account: project managers, testers and app owners.
Click App Store Connect in the top left corner of the window to get back to the main menu. Select Users and Roles, then click the Sandbox Testers tab. Click + next to the “Tester” title.
Fill out the information and click Save when you’re done. You can make up a first and last name for your test user, but you must use a real email address as Apple will send a verification email to the address. Once you receive that email, be sure to click the link in it to verify your address.
The email address you enter shouldn’t already be associated with an Apple ID account.
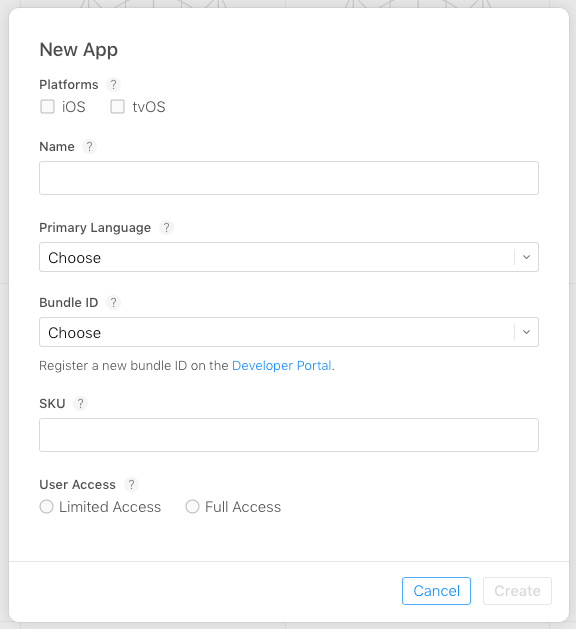
Create an iTunes App
Go to the My Apps section and create an app or use an existing app if you already have one.
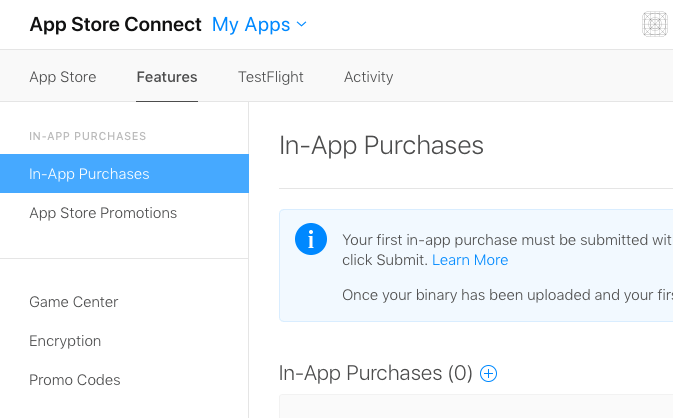
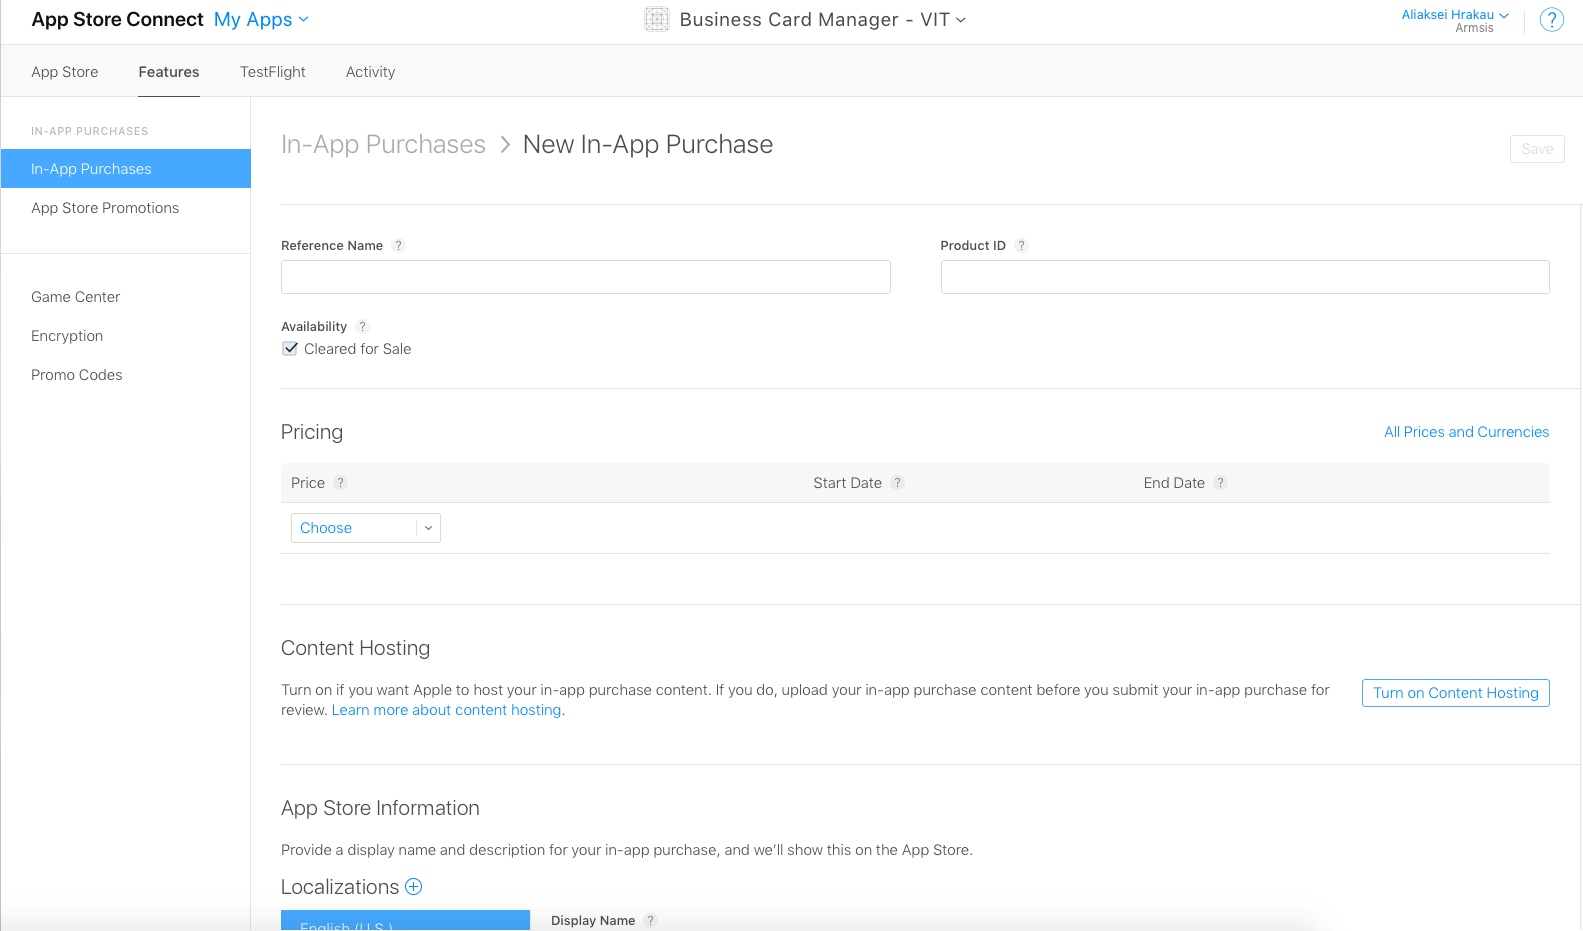
Create the IAP products
Click on your iTunes app and navigate to the Features section. To create a new IAP product, click on the + button and pick one of the types. Then enter the required metadata. It should look like in the pictures below.
The Code
Save the code in a separate class. I have named mine IAPHandler, but feel free to change the name. In this class, you will store everything related to In-App Purchases.
Variables
First, create variables from your IAP product ID. In my case, CONSUMABLE_PURCHASE_PRODUCT_ID and NON_CONSUMABLE_PURCHASE_PRODUCT_ID. Also, create variables for handling the IAP request and an array that will store all the available IAP products.
Class functions
- canMakePurchases() — returns a boolean value whether the device is able to make purchases or not.
- purchaseMyProduct(index: Int) — use this function for initiating a purchase. This function will raise the payment dialog. Send index to get the correct IAP product from the iapProducts array.
- restorePurchase() — function for restoring the IAP. Used if the user changes a device, and he already owns a non-consumable IAP in your app.
- fetchAvailableProducts() — Create a collection of product ID’s that you want to use, by adding all of them into an NSSet object. Remember to set the delegate method, so you can get the SKProduct results back.
Delegate Methods
- productsRequest (_ request:SKProductsRequest, didReceive response:SKProductsResponse) — returns all the available In-App Purchases and populates the iapProducts array. Triggered after calling the fetchAvailableProducts() function.
- paymentQueueRestoreCompletedTransactionsFinished(_ queue: SKPaymentQueue) — handles a situation where a user restores an IAP.
- paymentQueue(_ queue: SKPaymentQueue, updatedTransactions transactions: [SKPaymentTransaction]) — this delegate method is triggered after calling the purchaseMyProduct(index: Int) function. In this callback, you will get everything related to the IAP transaction.
Callback Handler
Additionally, I have added the callback handler. Create a closure purchaseStatusBlock(), which returns various IAP transaction statuses for clearer code. To make it even better, I have created an enumerated type called IAPHandlerAlertType, which will return a message for the suitable case.
Using the Code
Go to your UIViewController and then in your in viewDidLoad() function, fetch the products and also add the closure where you will get the response of the transaction that the user has made.
Then create an action where you will initialize the transaction window.
Testing
Sign in with your Sandbox User on your iOS device, navigate to your app and click the action to initiate the transaction. Don’t worry about the price on the transaction window. Since you are using a Sandbox User, nothing will be charged from your account.
By following the proper strategy, you can boost your sales up to the maximum point, and at the same time keep your users happy as they buy only what they want. Balance the pros and cons, and go for the In-App Purchases.


 (3 votes, average: 3.67 out of 5)
Stay tuned. Monthly digest of the best stories.